
How to Layer Bubble Tea for Café-Style Drinks
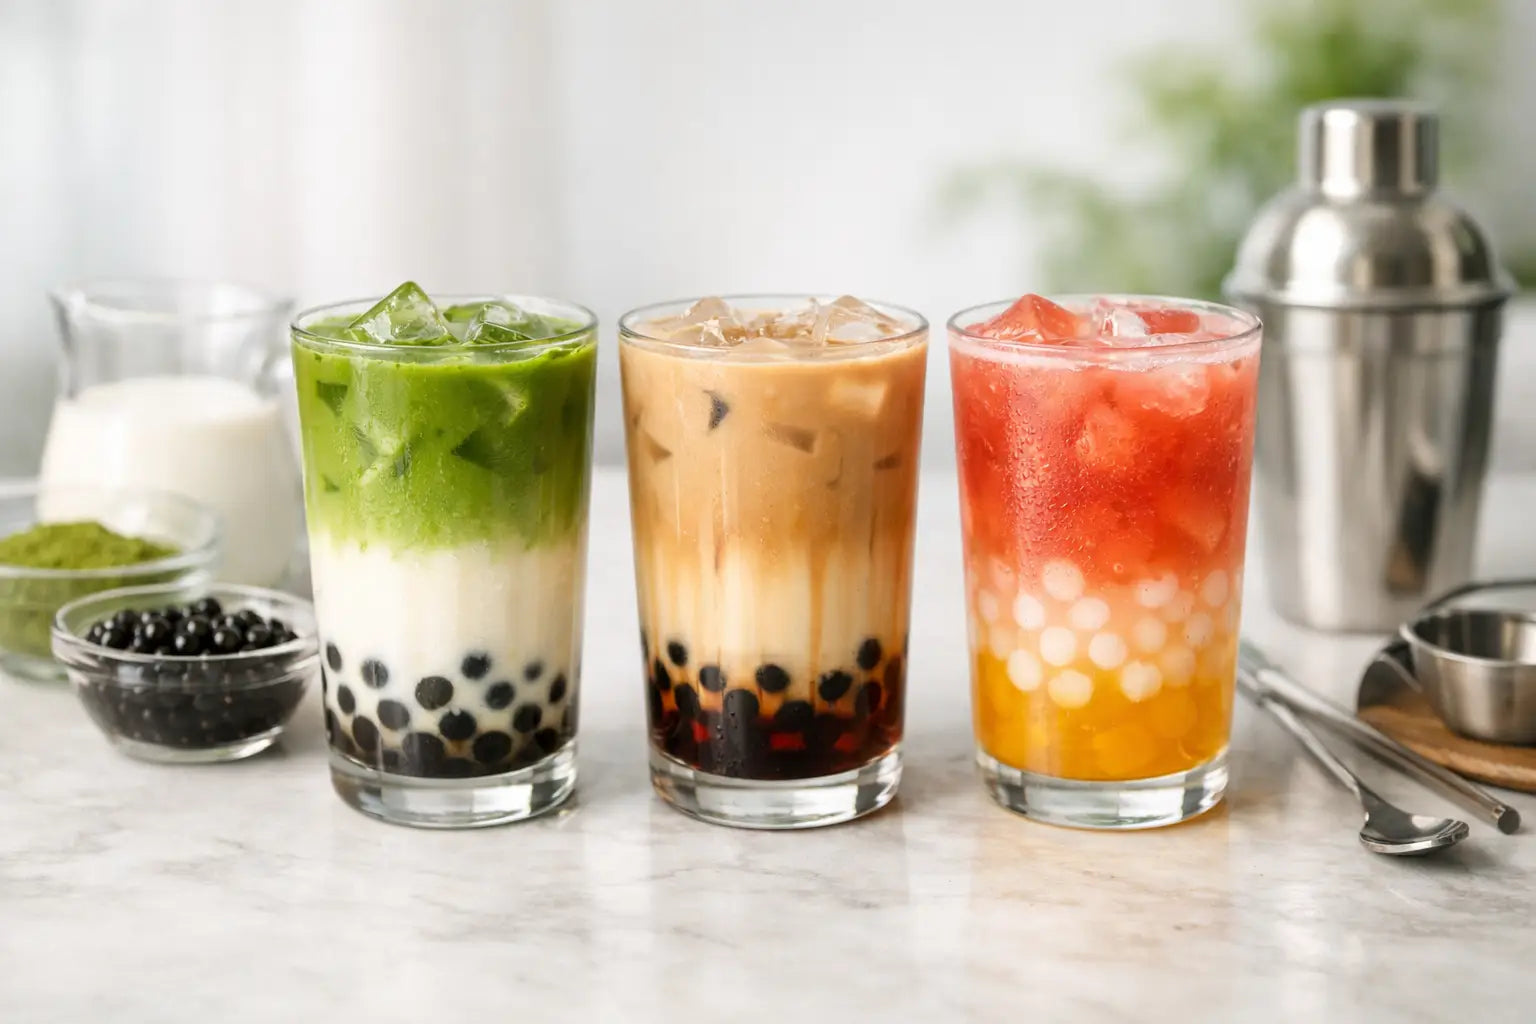
A clear cup, a chunky straw and a few distinct bands of colour can turn a homemade drink into the sort of bubble tea everyone reaches for their phone to photograph. The secret to how to layer bubble tea is not complicated equipment or fussy barista skills. It is all about the order you build the drink, the temperature of each ingredient and pouring with a gentle hand.
Layered drinks are brilliant for birthdays, sleepovers, family film nights and any afternoon that needs a little more fun. Better still, they are easy to customise. Keep the base creamy, make it fruity and bright, or mix the two for a café-style creation with your favourite toppings at the bottom.
How to Layer Bubble Tea Without a Murky Middle
A bubble tea layer is simply one ingredient sitting visibly above another. Some layers naturally stay separate for longer because they have different densities. Syrups are heavier than tea, for example, while milk teas tend to sit differently again. Ice also helps slow the ingredients as they meet, giving you those lovely stripes rather than one big swirl.
Start with a clean, clear glass. The wider the glass, the easier it is to see each layer, although a tall tumbler gives the most dramatic result. Chill the glass first if you can. Cold ingredients are less likely to blend straight away, especially when you are working with milk, juice and tea.
The usual build is toppings first, then syrup or fruit base, then plenty of ice, followed by the main tea or milk layer. Save any foam, whipped cream or light garnish for the very top. This keeps the chewy or juicy surprise exactly where it should be: ready for the first pull through a wide boba straw.
Begin With Toppings and Syrup
Spoon your cooked tapioca pearls, jelly or popping boba into the bottom of the glass. Tapioca pearls are naturally weighty, so they make a neat first layer and stay there. Popping boba is more delicate, so add it carefully and avoid packing it down with ice.
Next comes your syrup. This gives the drink colour from the base up and makes sure every sip is flavourful once you stir. Use just enough to coat the toppings and create a shallow pool at the bottom. If you are using a fruit purée, spoon it down the inside of the glass rather than dropping it into the centre. It will look tidier and is less likely to splash over the sides.
For a playful British-inspired twist, cherry syrup with milk tea gives a dessert-like effect, while rhubarb or elderflower flavours look especially pretty beneath a pale tea layer. The best combination depends on whether you want a creamy drink, a refreshing fruit tea, or something in between.
Use Ice as Your Layering Helper
Fill the glass generously with ice after the toppings and syrup. This is the easiest trick for beginners. The ice creates a barrier that slows the next liquid down, helping it settle rather than immediately mix with what is underneath.
Cubed ice works well, but crushed ice can make softer, more blended-looking layers. If your goal is sharp colour bands, choose larger cubes and fill the glass almost to the top. You may need slightly less tea than usual, but the drink will look more dramatic and stay colder for longer.
Do not pour hot tea over ice if you want crisp layers. Brew the tea first, then cool it completely in the fridge or shake it with ice in a separate shaker and strain it before building your drink. Warm tea melts the ice quickly, dilutes the flavour and sends those colours drifting together.
Pour Slowly for Clean Colour Bands
The final pour is where the magic happens. Hold a spoon, upside down, just above the ice and slowly pour your tea or milk mixture over the back of it. The liquid will fan out gently across the ice instead of blasting down into the syrup layer.
For a classic brown sugar-style look, build with pearls and brown sugar syrup, add ice, then pour in chilled milk tea. For a bright fruit tea, start with popping boba and a colourful syrup, add ice, then finish with cold green tea, black tea or a floral tea base. A creamy white layer over a vivid red, pink or purple syrup always looks brilliant in photos.
If you want three visible layers, make the middle section slightly thicker than tea. A milk mixture or fruit cordial works well. Pour the heaviest flavour first, add ice, then pour the middle layer slowly. Let it settle for a moment before adding the lightest liquid over the spoon. It will not stay perfectly separated forever, and that is part of the fun. Serve it straight away, then stir before drinking so the flavour is balanced.
Three Easy Layered Bubble Tea Ideas
A strawberry milk tea is a reliable crowd-pleaser. Add strawberry popping boba and strawberry syrup to the bottom, fill with ice, then gently pour over chilled milk tea. Finish with a little cream foam if you fancy an extra-special treat.
For a sunshine-bright mango drink, use mango jelly or popping boba, a spoonful of mango syrup and plenty of ice. Slowly add chilled jasmine or green tea for a light, refreshing finish. This one is especially good for warm-weather parties because it looks cheerful without being overly rich.
For something that feels more like a pudding in a cup, try cherry bakewell-inspired bubble tea. Begin with tapioca pearls and cherry syrup, add ice, then pour over a creamy almond-flavoured milk tea. A small cloud of whipped cream on top makes it wonderfully indulgent, though it is best saved for an occasional treat.
Common Layering Mistakes and Quick Fixes
When colours blend immediately, the most common cause is pouring too quickly. Add more ice and use the back-of-a-spoon method. It may also be that both liquids are very thin and similar in density. In that case, use a little more syrup at the bottom or make one layer creamier.
If your pearls have gone hard, the issue is usually timing rather than layering. Tapioca pearls are at their best soon after cooking. Prepare them close to serving time, coat them in syrup and do not leave them sitting in the fridge for hours. Jelly and popping boba are more forgiving for make-ahead party drinks.
A drink can also look flat when the glass is too full of one colour. Aim for a visible band of syrup and toppings, a generous ice section, then a contrasting tea or milk top. Clear cups matter here. A beautiful layer hidden in an opaque mug is still tasty, but it misses the mini café moment.
Make It a Bubble Tea Activity
Layering is even more fun when everyone gets to choose their own combination. Set out chilled tea, milk bases, syrups, toppings and ice, then let guests build a drink in their own clear cup. Younger bubble tea fans may prefer fruit tea and popping boba, while adults often enjoy a less-sweet tea base with chewy pearls. There is no single right recipe.
A Bubble Panda kit keeps the set-up simple by bringing the key flavours and toppings together, so you can spend less time hunting for ingredients and more time creating your dream cup. Prepare the tea and toppings before friends arrive, then let the final pouring become part of the occasion.
The loveliest layered bubble teas are not necessarily the most perfect ones. Choose colours you genuinely fancy, pour slowly, serve quickly and enjoy the satisfying moment when a swirl of syrup rises through the tea with that first cheerful stir.
